

Go to Main Content Go to Footer

How to Choose the Best Electric Mountain Bike?

Choosing the best Electric Mountain Bike is less about chasing the biggest battery or the boldest motor. It is about matching the bike to your trails, body, and riding habits. A steep, rocky climb demands different support from a smooth forest path. So does a short evening ride compared with a full day in the hills.

Court Rye, founder of ElectricBikeReview.com, is an experienced electric-bike reviewer. A useful buying principle, paraphrased from his practical review approach, is: “Choose for the rides you actually do, not the specifications that look impressive.” Treat that as a guide, not a direct quotation. Before comparing models, note your usual distance, climbing, terrain, and comfort needs. Then check motor assistance, battery capacity, suspension, brakes, and frame fit. A powerful motor cannot fix poor sizing. And a large battery may add weight you rarely need.

Small details matter. Imagine lifting the bike onto a car rack, turning it through a narrow gate, or controlling it on loose gravel. Test the display and assistance modes, too; confusing controls can distract you on a rough trail. Compare warranty terms and local service access, since even dependable components need maintenance.

There is no perfect choice. A lighter bike may feel easier to handle but offer less range. A plush setup can feel calm on rocks, yet less lively on smoother ground. I would not buy from a spec sheet alone. Ride several options if possible, and notice what feels awkward as well as what feels exciting. That honest test often beats a flashy feature list.
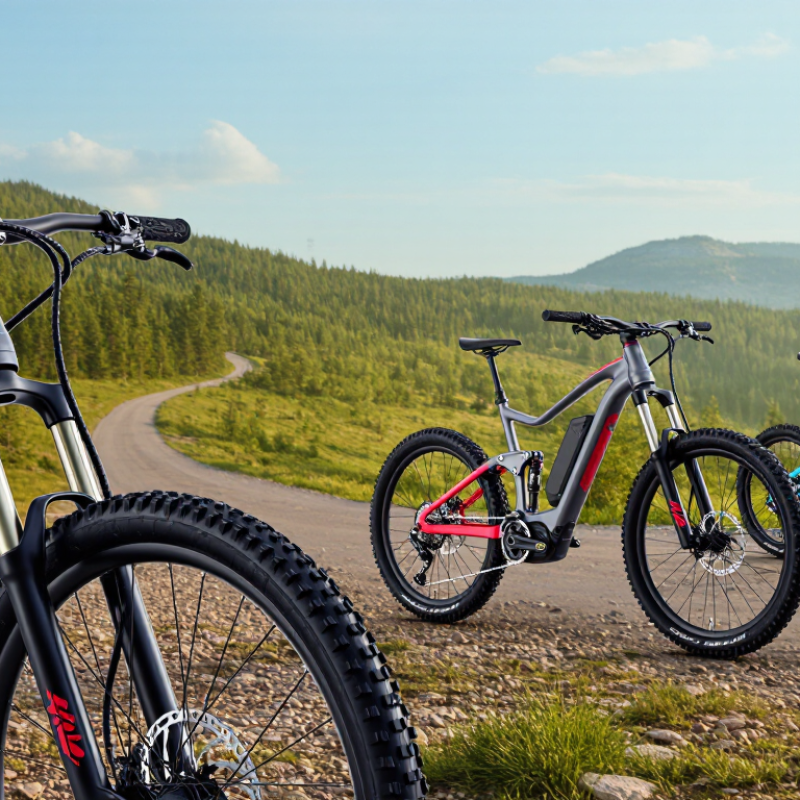
How to Choose the Best Electric Mountain Bike?

Define Your Riding Needs and Check E-Bike Limits: 250 W/25 km/h EU; 20/28 mph U.S.

Choosing an electric mountain bike starts with honest questions about your trails. Do you climb rocky fire roads, ride tight forest turns, or mostly cruise gentle paths? A heavy battery can help on long climbs, but it may feel cumbersome on narrow switchbacks. Fit matters more.

Check the rules where you ride before comparing motors. In the EU, a standard pedal-assist bicycle generally has a 250 W maximum continuous rated power and assistance that stops at 25 km/h. In the U.S., common e-bike classes use assistance cutoffs of 20 or 28 mph, with class definitions and access rules varying by location. These figures are not interchangeable. Confirm the bike’s classification and local trail requirements.

Tips:

Look for the power and speed labels on the bike’s specifications. Ask whether assistance cuts out smoothly at the limit. Test the bike on a familiar incline, if possible. A short test may not reveal everything.

Also check battery range against your real route, not the most optimistic estimate. Cold weather, steep grades, rider weight, and frequent high-assist use can reduce range. I would leave a reserve; it is easy to underestimate a climb. Check brake feel, tire grip, and whether the frame size lets you move comfortably over the bike. A powerful motor cannot fix poor fit.

Compare Motors by Rated Power (W), Torque (N·m), and Drive Type

Rated power, measured in watts, indicates a motor’s continuous output, not necessarily its brief peak. Compare rated figures across bikes, but check how each maker defines and tests them. Numbers need context. A 250 W motor can feel capable on rolling trails, while steep, loose climbs may demand more support. Torque, measured in newton-metres (N·m), describes rotational force at the crank or wheel. Higher torque can help with slow climbs and quick starts, especially when carrying a pack. It does not guarantee better range or smoother control. I would not choose by the largest number alone; that is an easy mistake.

Drive type changes how that power reaches the trail. A mid-drive motor works through the bicycle’s gears, which can help on varied climbs and keep weight near the frame’s center. A hub motor pushes from the wheel and often feels simpler on steady paths, though climbing response can vary by design. Try both if possible. Notice whether assistance arrives smoothly when you press the pedals, or surges on a rocky turn. Also compare support levels and battery capacity, since frequent high-power use can shorten a ride. A brief parking-lot test may miss that. Ask for a controlled hill test, then check the motor’s rated power, torque, and drive type together.

Choose Battery Capacity in Watt-Hours (Wh) for Your Terrain and Range Needs

Battery capacity, measured in watt-hours (Wh), gives a useful starting point when matching an electric mountain bike to your rides. A 500 Wh battery stores less energy than a 700 Wh battery, but the larger number does not guarantee a specific distance. Watt-hours roughly equal battery voltage multiplied by amp-hours. Think of them as your energy budget.

Your terrain changes how quickly that budget is spent. A rolling forest route with firm dirt may use less power than a steep, rocky climb with frequent acceleration. Rider weight, tire pressure, temperature, assist level, and cargo also matter. On hilly trails, choosing extra capacity can help you finish without carefully rationing assistance. For occasional short rides, a smaller battery may be easier to carry and sufficient.

Be realistic about range estimates. A route advertised as suitable for one charge may feel very different in cold weather or muddy conditions. Leave a reserve rather than planning to use every watt-hour. I find this part imperfect: two rides on the same trail can drain noticeably different amounts. Check the elevation gain and distance of your usual routes, then compare them with independent tests on similar terrain. A compact note of your own battery use after each ride can be more useful than a single optimistic estimate.

Choose Battery Capacity for Your Terrain and Range Needs

Estimated range increases with battery capacity, but demanding terrain uses more energy. These illustrative estimates assume consumption of about 9 Wh/km on flat trails, 12.5 Wh/km on mixed terrain, and 18 Wh/km on steep trails. Actual range varies with rider and bike weight, assist level, tires, weather, and trail conditions.

Match Wheel Size and Suspension Travel to Trail Type and Rider Fit

Wheel size and suspension travel should match the trail beneath your tires, not a trend. The International Mountain Bicycling Association’s Trail Difficulty Rating System uses five difficulty levels, from easiest to extremely difficult. That’s a useful reminder: “mountain biking” covers very different terrain. On smoother, tighter trails, a 27.5-inch wheel can feel nimble and easier to place through switchbacks. A 29-inch wheel usually rolls more calmly over roots and shallow rocks, though it may feel less quick in cramped turns. Rider height matters, but reach, standover clearance, and confidence handling the bike matter more than a single size rule.

For flowing trails with modest bumps, about 120–140 mm of suspension travel is often a sensible starting point. Steeper, rockier routes may suit 150–170 mm, which offers more control on hard impacts but can feel less lively on climbs. These ranges are practical guidance, not a standard from IMBA. Match the bike to the trails you actually ride. A long-travel setup can feel like too much on a smooth local loop.

Fit changes the picture. Test the bike on a familiar climb and a rough descent, if possible. Check that you can shift your weight without stretching, and that the front wheel tracks predictably through turns. I’d be cautious about choosing a wheel size from height alone; frame geometry varies, and my first guess can be wrong. Fit matters. The best setup is the one you can steer comfortably when the trail gets rough.

How to Choose the Best Electric Mountain Bike? — Match Wheel Size and Suspension Travel to Trail Type and Rider Fit

Trail Type Typical Suspension Travel Common Wheel Setup Why It Can Suit the Trail Rider-Fit and Setup Notes
Cross-country and smooth forest trails About 120–130 mm front; 110–130 mm rear 29-inch Large wheels roll efficiently over small bumps and maintain momentum on long, smoother routes. Moderate travel keeps the bike composed without prioritizing large-impact capability. A 29-inch wheel is not automatically the right fit for every rider. Check frame reach, standover clearance, and handlebar position; smaller riders may prefer a frame and wheel package that feels easier to control.
General trail riding About 130–150 mm front; 120–140 mm rear 29-inch or mullet A versatile range for mixed climbs, descents, roots, and moderate rock sections. A 29-inch front wheel can help roll over obstacles, while a smaller rear wheel can make the bike feel more agile. Choose based on handling preference and frame fit, not wheel size alone. Confirm that the bike’s geometry and suspension setup suit your height, riding position, and usual terrain.
Rough all-mountain terrain About 150–170 mm front; 140–160 mm rear 29-inch or mullet More travel can improve control and comfort on repeated impacts and steep, technical descents. A mullet setup may combine front-wheel rollover with a more maneuverable rear end. More travel can change handling and climbing feel. Check the bike’s recommended sag and setup range, and make sure the cockpit remains comfortable when standing and descending.
Enduro and steep, demanding descents About 160–180 mm front; 150–170 mm rear 29-inch or mullet Longer-travel suspension is designed to handle larger impacts and sustained rough descents. Wheel choice depends on the balance of stability, clearance, and maneuverability the rider wants. Prioritize a correctly sized frame and predictable control. A smaller rear wheel may help with clearance or agility for some riders, but it is not a substitute for choosing the right frame size.
Tight, twisty trails or riders seeking extra maneuverability Often about 130–160 mm front; 120–150 mm rear, depending on terrain 27.5-inch or mullet A smaller rear wheel can feel quicker to change direction and may provide additional rear-wheel clearance. A 27.5-inch setup can suit riders who prefer a compact, lively feel. Do not select 27.5-inch wheels solely because of rider height. Compare the bike’s reach, stack, standover, and handling; check that the frame is specifically designed for its wheel configuration.

Selection tip: These travel ranges are broad guidelines, not strict rules. Wheel size and suspension travel vary by bike design and intended use. For the best fit, compare frame geometry with your measurements and test ride when possible; also follow the manufacturer’s wheel, tire, and suspension compatibility guidance.

Verify Electrical Safety Certifications: UL 2849 for E-Bikes, UL 2271 for Batteries

When comparing electric mountain bikes, look beyond motor power and suspension. Check whether the complete bike’s electrical system is certified to UL 2849, a standard addressing electrical and fire-safety risks in e-bikes. The battery should also carry certification to UL 2271, which covers rechargeable batteries used in light electric vehicles. These marks answer different questions. One does not replace the other.

Check the actual bike and battery labels, then compare their model details with the certification information supplied by the seller or certification organization. A logo in a product photo is not enough; it may belong to a different model or component. Also confirm that the supplied charger is intended for that battery. Small detail, big consequence.

Certification is not a promise of perfect performance or a substitute for careful charging and maintenance. Paperwork can feel tedious, and product pages sometimes make the distinction unclear. Ask for documentation before buying, especially if the battery is removable or replacement parts are sold separately. If the model numbers do not match, pause and get clarification.

Logo Access 360