

Go to Main Content Go to Footer

How to Choose the Right Bicycle End Caps?

Choosing the right Bicycle End Caps is a small decision with a direct effect on wheel fit, bearing protection, and safe installation. These parts help match a hub to a specific axle and fork or frame standard. A cap that looks close may still have the wrong diameter, seating depth, or interface. Check the hub maker’s compatibility chart before ordering. Measure carefully, too. A few millimeters matter.

Pay attention to the hub model, axle type, and end-cap position. Front and rear caps are not always interchangeable, and some hubs require different caps on the drive and non-drive sides. Inspect the old parts for wear, damaged seals, or a loose fit. Then compare their dimensions with the replacement specifications. Clean mating surfaces before installation, and follow the manufacturer’s torque guidance where applicable. No guesswork here.

A practical workshop rule is: “Match the hub specification, not just the product photo.” I can’t verify a named expert’s quotation from the material provided, so I won’t invent one. That restraint matters. Product listings can be vague, and even experienced riders sometimes assume that similar-looking caps will fit. They may not. A careful check can prevent wasted time and help protect the hub’s bearings during regular riding.
How to Choose the Right Bicycle End Caps?

Identify the End Cap Type: Hub, Handlebar, or Cable

How to Choose the Right Bicycle End Caps?

The word “end cap” can describe three different parts, so identify where yours sits before ordering.

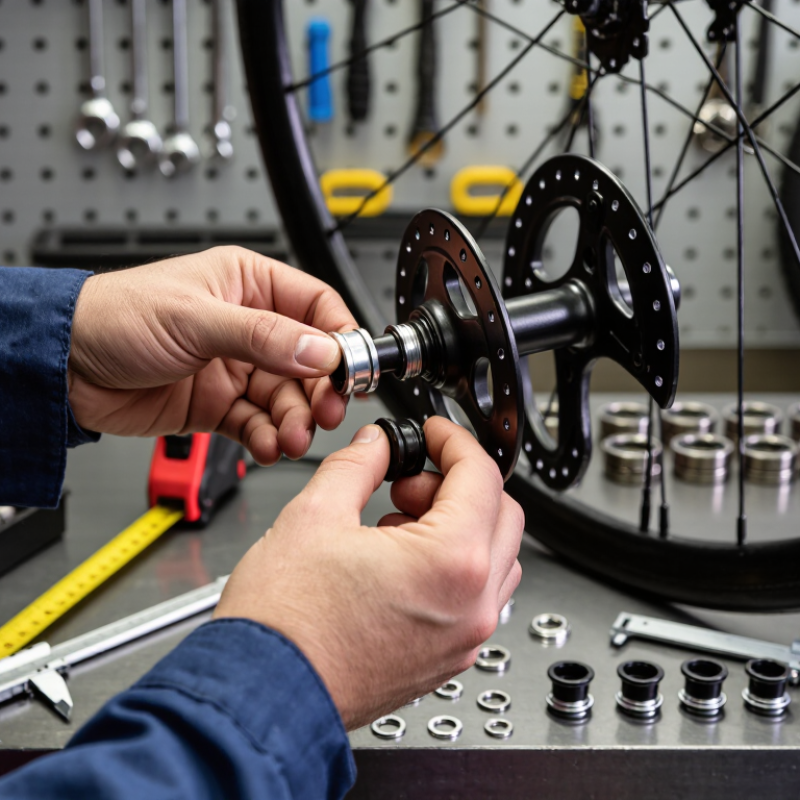
Hub end caps fit the axle ends and help keep dirt away from the hub bearings. They must match the hub’s axle system and dimensions; a similar-looking part may still fit poorly. Check the hub maker’s specifications or compare measurements with the old caps. Don’t force a tight fit.

Handlebar end caps, often called bar plugs, close the open ends of the bars. Measure the handlebar’s inside diameter, not its outside width. Some plugs expand with a screw, while others push in snugly. A loose plug can fall out; an oversized one may damage the bar. Check before buying.

Cable end caps are small sleeves crimped onto exposed inner cable ends to prevent fraying. They are not the same as housing ferrules, which sit at the ends of cable housing. Match the cap to the cable’s thickness, then use proper cable cutters and a controlled crimp. Too much pressure can crush the cable. The terminology is confusing, even for careful riders, so inspect the part’s location and job before choosing a replacement.

Match Hub End Caps to Axle Standards: 12×100, 15×100, 12×142, and 12×148 mm

How to Choose the Right Bicycle End Caps?

Match Hub End Caps to Axle Standards: 12×100, 15×100, 12×142, and 12×148 mm

End caps must match both axle diameter and hub spacing. Common front standards include 12×100 mm and 15×100 mm; rear standards include 12×142 mm and 12×148 mm. The first number is the axle diameter, and the second is the hub’s nominal width. These dimensions come from industry hub-fitment specifications. ISO 4210-2:2023 covers bicycle safety requirements, but it does not make different hub interfaces interchangeable. Check the hub’s technical fitment chart before ordering: two caps can look nearly identical and still seat differently.

Tips: Confirm front or rear, axle diameter, spacing, and hub model. Measure carefully. A ruler can mislead.

In the workshop, remove the old caps and compare their shape, shoulder depth, and contact surface with the replacement. A 12×148 mm rear setup is commonly called Boost; 12×142 mm is narrower. The extra six millimetres are not gained by swapping caps unless the hub is designed for that conversion. Likewise, a 15×100 mm front cap will not fit a 12 mm axle just because both hubs measure 100 mm wide. Use the wheel or hub maker’s documented compatibility data, then verify rotor and frame clearance after installation. Fitment charts are useful, but older hubs may have undocumented revisions—sometimes the model name alone is not enough.

Measure Handlebar Internal Diameter Before Selecting a Bar-End Plug

How to Choose the Right Bicycle End Caps?
Measure Handlebar Internal Diameter Before Selecting a Bar-End Plug

A bar-end plug should match the handlebar’s internal bore, not its outside diameter. Many flat handlebars have a 22.2 mm grip area, but wall thickness and construction change the inner opening. Measure the clean bore with a caliper, checking in two directions because the opening may be slightly oval. ISO 4210-5:2023 sets out steering-component test methods, but does not define one universal plug size. A close fit matters. I would not assume two bars with the same outside measurement need identical plugs.

Tips: Remove the old plug and wipe away grit. Measure the bore at its opening, then check the plug’s stated fitting range. If using a ruler, read the measurement carefully; small errors can mean a loose fit. Don’t force a plug that resists.

After fitting, the plug should sit securely and evenly, without rattling or exposing a sharp handlebar edge. Check both ends, especially after changing grips or trimming a bar. Expansion-style plugs need enough room to tighten, while push-in plugs rely on a snug match. A plug that spins may be undersized; one that will not enter may be too large. Recheck after the first ride. I sometimes find this step gets rushed, and that is where the fit can go wrong.

Choose Cable End Caps for 1.2 mm Shift or 1.5–1.6 mm Brake Cables

A cable end cap should match the inner cable, not the housing. Most shift cables measure about 1.2 mm, while brake cables are commonly 1.5–1.6 mm. Check the cable specification or measure its bare end with calipers; coatings and dirt can make a close fit look wrong. That small mismatch matters.

A cap that is too large may slide or crimp unevenly. One that is too small can be difficult to fit and may damage the strands. Use a proper cable-capping tool, then make a firm, controlled squeeze near the cable tip. Do not crush it flat. I still double-check the fit by tugging lightly after crimping; it is a simple step, but easy to skip when rushing.

Cable end caps are different from housing ferrules. End caps tidy and secure exposed inner-wire strands, while ferrules sit on the housing ends. Keep the two jobs separate. After fitting a brake-cable cap, inspect the cable for fraying and confirm the brake operates normally before riding. If the strands are already damaged, replacing the cable is safer than hiding the problem under a cap.

Check Material, Fit, and Retention Before Installation

How to Choose the Right Bicycle End Caps?

Check Material, Fit, and Retention Before Installation

Before installing bicycle end caps, check their material and intended use. Aluminum is lightweight and resists corrosion; steel can handle rougher knocks but adds weight. Plastic caps may work well for casual riding, though brittle plastic can crack after impacts or in cold weather. Inspect the edges and opening, too. A sharp seam can catch bar tape or leave a rough finish. Small details matter.

Fit is more than matching a product label. Check your handlebar’s inner diameter and end shape, since plugs and expanding-style caps may attach differently. Follow the handlebar maker’s specifications when available. A loose cap can work free, while forcing an oversized one may damage the bar. Retention matters. Check that the cap sits securely without excessive pressure, and tighten any fastener only as instructed. I would not trust a snug feel alone; it can be misleading. After installation, gently tug the cap and look for movement before riding. A quick visual check can miss a poor fit, especially when tape partly hides the bar end.

Logo Access 360