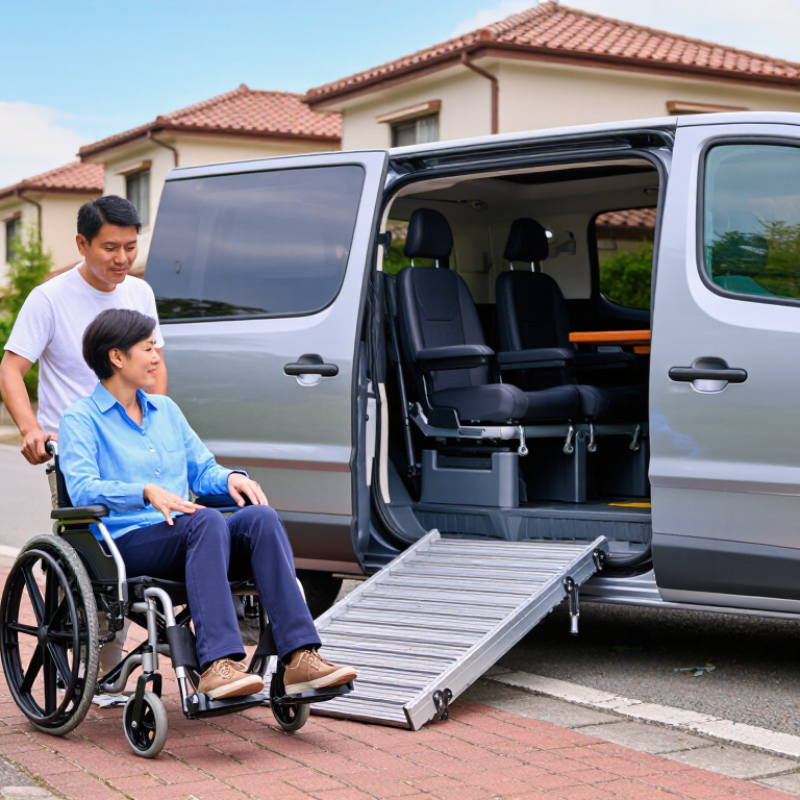
| Wheelchair Dimensions |
Overall wheelchair width, length, height, and weight |
Measure the occupied wheelchair, including seating supports, cushions, headrests, footrests, and any attached equipment. Allow additional clearance beyond the measured width and height. |
A van must provide enough doorway, ramp, lift, and interior clearance for the specific wheelchair—not only for a standard manual chair. |
| Wheelchair Type |
Manual, powered, reclining, standing, or specialized wheelchair |
Powered and specialized chairs generally require more interior space and may need higher ramp or lift capacity. |
Reclining backs, elevated leg rests, ventilators, and other accessories can increase the required travel envelope and securement space. |
| Entry Method |
Rear entry or side entry |
Choose the entry location according to parking habits, curb access, driveway width, and whether the wheelchair user will enter beside other passengers. |
Side entry can be convenient in accessible parking spaces and may support transfer to a front driving position. Rear entry may work better where side clearance is limited. |
| Doorway Clearance |
Usable doorway width and height |
The clear opening should exceed the wheelchair’s actual width and height, with extra room for safe maneuvering. Confirm the opening after doors, seals, and conversion equipment are installed. |
A nominal door size may not equal the usable opening. Insufficient clearance can make entry difficult or prevent access altogether. |
| Ramp or Lift |
Ramp slope, platform size, lifting capacity, and operating space |
Check the total combined weight of the wheelchair user and mobility device against the equipment rating. A gentler ramp slope generally improves ease of use. |
The access system must be manageable for the user or caregiver and must fit the available parking and loading area. |
| Interior Headroom |
Floor-to-ceiling height along the entire access path |
Compare the user’s seated height and posture with the actual interior height at the doorway, ramp path, and intended travel position. |
Adequate headroom reduces the risk of contact with the roof and makes entry, positioning, and exit more comfortable. |
| Floor Layout |
Wheelchair position, turning space, and passenger seating arrangement |
Determine whether the wheelchair will be positioned in the front, middle, or rear of the cabin and whether other passengers need access to adjacent seats. |
A layout that works for one passenger may restrict family seating, caregiver access, luggage space, or emergency evacuation routes. |
| Securement System |
Wheelchair tie-downs and occupant restraint |
Use a properly installed, compatible four-point wheelchair securement system and a separate occupant restraint system. Follow the equipment and vehicle manufacturer’s instructions. |
The wheelchair and occupant need to remain stable during normal driving and sudden braking. The restraint arrangement should be checked by a qualified installer. |
| Passenger Transfers |
Whether the user remains in the wheelchair or transfers to a vehicle seat |
If transfers are required, assess seat height, door opening, grab handles, transfer boards, swivel features, and caregiver reach. |
A van designed for in-wheelchair travel may not provide the support needed for safe and comfortable transfers. |
| Driving Requirements |
Passenger-only use or wheelchair-accessible driving |
For wheelchair-accessible driving, assess transfer ability, steering and pedal operation, hand controls, lowered-floor configuration, and visibility with a qualified mobility specialist. |
Driving adaptations must match the individual’s functional abilities and may require professional assessment, installation, and training. |
| Caregiver Access |
Space for assistance, medical equipment, and personal care |
List oxygen equipment, ventilators, walkers, bags, portable ramps, and other items that must travel with the passenger. |
Equipment storage should not block the ramp, lift, emergency exits, wheelchair securement points, or the driver’s visibility. |
| Vehicle Capacity |
Passenger count, wheelchair count, and payload |
Confirm the vehicle’s seating capacity and payload after conversion, including passengers, wheelchairs, lifts, ramps, and luggage. |
Added accessibility equipment contributes to vehicle weight and can affect the number of passengers and amount of cargo that can be carried safely. |
| Parking and Daily Use |
Garage height, driveway width, curb conditions, and loading frequency |
Measure the garage entrance, parking space, side clearance, turning area, and surface conditions before selecting an entry system. |
A van may meet interior requirements but still be impractical if the ramp or lift cannot be deployed safely at the locations used most often. |
| Safety and Visibility |
Lighting, restraints, step protection, alarms, and driver visibility |
Check for non-slip surfaces, adequate entry lighting, lift or ramp interlocks, accessible grab points, clear sightlines, and secure storage. |
These features help reduce falls, unintended movement, loading errors, and visibility problems during everyday use. |
| Testing Before Purchase |
Real-world trial with the passenger and wheelchair |
Test entry, positioning, securement, seating, unloading, and parking at representative locations before signing a purchase or lease agreement. |
A hands-on trial can reveal clearance, reach, comfort, and maneuverability issues that measurements alone may not identify. |
| Final Verification |
Professional inspection and documentation |
Have the completed vehicle inspected by a qualified mobility-equipment professional and review all operating, maintenance, and restraint instructions. |
Accessibility requirements vary by passenger and vehicle configuration. Final verification helps confirm that the selected van is suitable for the intended user and daily travel conditions. |