


Go to Main Content Go to Footer

10 Tips for Choosing the Right Wired Push Button?

Choosing the right Wired Push Button is a practical decision, not a simple catalog exercise. The button may sit quietly on a panel, yet it controls a human action, a machine response, or a safety-related process. A good choice must match the operator, equipment, environment, and expected service life.

Don Norman, a leading authority in human-centered design, said, “Design is really an act of communication.” That idea applies directly to control panels. A red button with a clear label should communicate its function within seconds. Its size, color, travel, and resistance should feel deliberate, even when the operator wears gloves. Small details matter. Very much.

This guide, “10 Tips for Choosing the Right Wired Push Button,” examines the factors that buyers often compare too late. These include contact configuration, rated voltage, switching current, mounting dimensions, actuation force, ingress protection, material quality, and mechanical endurance. IEC 60947-5-1 may also matter for industrial control equipment, depending on the application and certification requirements. Check the datasheet carefully. Product names can hide important differences.

A button used beside a dusty conveyor needs different protection from one installed inside a clean control cabinet. A wet workshop, cold warehouse, or vibrating machine adds further pressure. Even experienced teams sometimes focus on price and overlook wiring access or replacement time. That is an imperfect habit worth challenging. The best Wired Push Button is not always the most expensive model. It is the one that performs predictably, communicates clearly, and remains serviceable after thousands of presses.
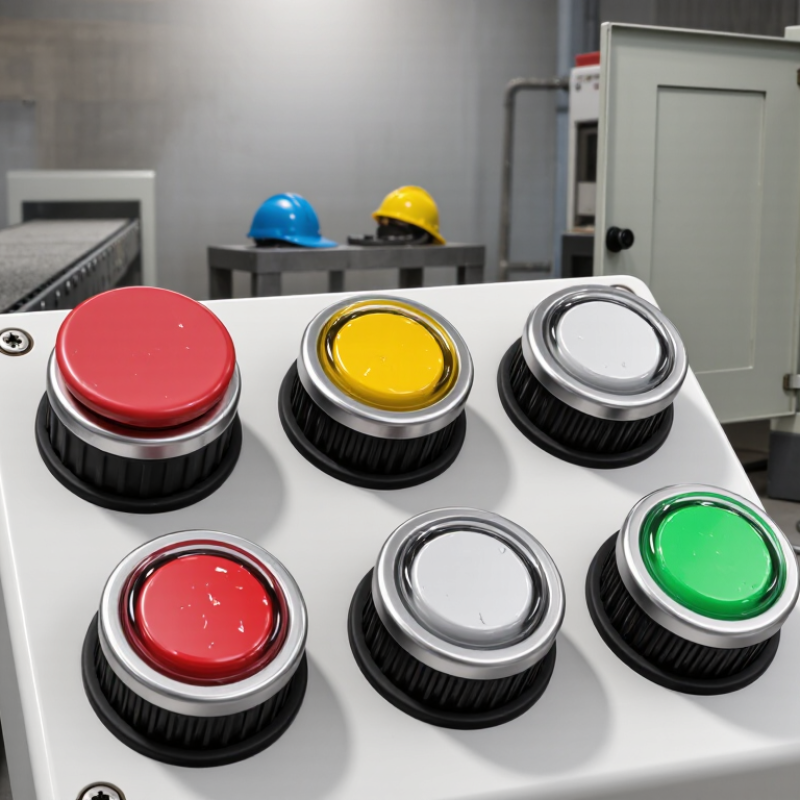
10 Tips for Choosing the Right Wired Push Button?

Define the Application: Function, Voltage, Current, and Duty Cycle

Before choosing a wired push button, define what the control must do. A momentary button sends a signal only while pressed; a latching button maintains its state after release. That difference changes the circuit, operator behavior, and safety response. Write the function in one line. In field testing, vague descriptions caused avoidable wiring changes. “Start motor” is not enough; specify whether the button commands a relay, controller input, or load directly.

Check voltage at the button terminals, not only the supply label. A 24 V DC control circuit behaves differently from a 230 V AC circuit. Confirm the rated voltage matches the real system, including tolerances and switching transients. Current rating deserves equal attention. A button rated for resistive current may not handle motor inrush or an inductive coil. Measure normal current, estimate peak current, and verify the load category in the technical documentation. Do not guess here.

Duty cycle describes how often and how long the button operates. A door control pressed ten times daily has different demands from a machine interface used every few seconds. Record presses per hour, hold duration, and expected service life. Look at contact bounce, enclosure protection, cable length, and terminal security. I have sometimes focused too heavily on headline current ratings and missed mechanical wear. That mistake is worth revisiting. For safety-related equipment, a qualified professional should verify the complete circuit before installation.

Match Contact Ratings with IEC 60947-5-1 and UL 508 Requirements

10 Tips for Choosing the Right Wired Push Button

A wired push button is not correctly selected by voltage alone. Its contacts must match the actual load, switching duty, and installation environment. IEC 60947-5-1 defines utilization categories such as AC-15 for electromagnetic loads and DC-13 for solenoids. These categories reflect real switching stress, not merely steady current. A motor contactor coil can damage contacts rated only for resistive loads. It may look acceptable during a bench test.

Check ten points: load type, voltage, current, AC or DC operation, utilization category, contact material, short-circuit protection, terminal temperature, enclosure rating, and approval markings. UL 508 practice also uses pilot-duty designations, including A600, A300, and R300. Never replace an A600 requirement with a similar-looking ampere value. The test conditions differ. Verify the manufacturer’s rating table and the complete circuit diagram.

Field inspections often find oversized buttons paired with underrated contacts. That choice saves little and creates uncertainty. The U.S. Bureau of Labor Statistics recorded 126 fatal occupational injuries involving electrical exposure in 2023. A push button is only one small control component, but its failure can initiate unexpected machine movement. IEC 60947-5-1 and UL 508 should be treated as design references, not decorative certification language. Confirm the exact marking, terminal torque, and protective device before approval. I still consider field temperature and operator habits easy to underestimate. That deserves a second review.

10 Tips for Choosing the Right Wired Push Button: Match Contact Ratings with IEC 60947-5-1 and UL 508 Requirements

The chart shows representative IEC 60947-5-1 operational-current reference points for AC-15 and DC-13 control loads. When selecting a wired push button, confirm the contact voltage, current, utilization category, electrical endurance, and short-circuit protection. IEC utilization-category values should not be treated as automatic UL 508 ratings; UL 508 certification, pilot-duty markings, and the manufacturer’s tested load ratings must be verified separately.

Reference basis: IEC 60947-5-1 utilization-category reference values. Actual permissible ratings depend on the specific contact block, load type, enclosure, wiring method, and certification marking.

Select Protection Levels Using IEC 60529 IP Codes and NEMA 250

A wired push button often fails at the enclosure, not the switch. IEC 60529 assigns an IP code using two digits. The first measures protection against solids, from 0 to 6. The second measures water resistance, from 0 to 9K. An IP65 button is dust-tight and resists water jets. An IP67 button also supports temporary immersion, commonly up to one metre for 30 minutes under specified test conditions. That detail matters near washdown areas.

Tip: Match the code to the real exposure, not the product label alone. Check hose pressure, water temperature, cleaning chemicals, cable entry, and mounting angle. IEC 60529 testing may not represent every field condition. I have seen moisture enter through a poorly tightened gland. The button was not the weak point.

NEMA 250 uses enclosure Type numbers and evaluates factors such as water, dust, corrosion, and hazardous conditions. However, NEMA states that its enclosure Types do not directly convert to IEC IP codes. A Type 4X enclosure, for example, includes protection against hose-directed water and added corrosion resistance. A Type 6 enclosure addresses temporary submersion. These ratings describe the enclosure system, not automatically the complete wired assembly.

Tip: Request the test standard, edition, and conditions from the supplier. Record the selected IP or NEMA rating in the installation specification. Small omissions become expensive later.

According to IEC 60529 and NEMA 250 test principles, field sealing, cable glands, and panel cutouts must be considered together.

Verify Materials, Terminals, Wire Gauge, and Operating Temperature

10 Tips for Choosing the Right Wired Push Button?

A wired push button should match its environment, not only its appearance. Check the body material for impact resistance, chemical exposure, and repeated handling. Stainless steel suits demanding panels, while engineered plastic can reduce cost and weight. Inspect the sealing details around the actuator and mounting nut. A small gap can invite dust or moisture.

Terminals deserve equal attention. Screw terminals allow field adjustment, but they need correct tightening torque. Quick-connect terminals save installation time, yet they must fit the selected wire size securely. Solder terminals require clean joints and proper strain relief. Give the connection a gentle pull test. It should not move.

Wire gauge must support the circuit’s current, voltage drop, and cable length. Do not choose it from current alone. Thick insulation may also prevent a terminal from closing properly. Check conductor flexibility, ferrule compatibility, and the manufacturer’s recommended range. This detail is easy to miss. Operating temperature includes both room temperature and heat inside the enclosure. Nearby power devices can raise the local temperature quickly. Cold conditions may harden insulation and reduce button responsiveness. Confirm the full temperature range, load rating, and switching conditions together. A button rated for a wide ambient range may still fail when its terminals overheat. That distinction deserves another check.

Check Safety Compliance, Service Life, Mounting, and Environmental Tests

Choosing a wired push button starts with safety, not appearance. Tip 1: Check certification for the intended market. IEC 60947-5-1 covers low-voltage control devices, while IEC 60204-1 addresses machinery electrical equipment. Tip 2: Review contact ratings under the actual voltage and load. A higher current label does not guarantee safe switching. The U.S. Bureau of Labor Statistics reported 5,283 fatal work injuries in 2023, showing why small control components deserve serious review.

Tip 3: Examine mechanical and electrical service life separately. Ask for cycle-test conditions, load type, and failure criteria. Tip 4: Confirm whether the button uses positive opening contacts for emergency-related circuits. Tip 5: Check wire terminals, strain relief, and finger protection. I once trusted a “heavy-duty” label too quickly. The mounting thread later loosened under vibration. That mistake was avoidable.

Tip 6: Match the mounting hole, panel thickness, and guard clearance precisely. Tip 7: Select an IP rating according to IEC 60529, then verify how the test was performed. IP65 may resist dust and water jets, but it does not promise chemical resistance. Tip 8: Request temperature, humidity, vibration, and salt-mist test results. Tip 9: Inspect cable flexibility near the enclosure. Tip 10: Keep certificates, test reports, and inspection records together. Specifications can be incomplete. Reflection matters.

Logo Access 360